Wednesday, February 19, 2014

Prismacolor Pencils Peony Party*

*well birthday really, but that didn't roll off the tongue as easily.

Anyway, I made this card for my mother-in-law for her birthday next week.  I took another lesson from Lindsay the Frugalcrafter and just kept working my pencils rather than relying on any solvent based blender (like this video). I LOVE how it all turned out. Now if I had been clever I would have told you how this was all planned out. Honestly I was playing with my Prismacolors after not getting the results I wanted with my normal watercolor pencils. It wasn't necessarily bad just not what I wanted. 


Also what I didn't want was my flower floating in the middle of the page or to die cut or fussy cut it so I cut a mask and stamped around it. It was definitely out of my comfort zone but I think it works. 

Full disclosure! Here's the watercolor attempt! I think I like more water than cardstock will allow so watercolor paper from now on. Also I was trying to do the whole invisible stamping thing...need to get working on that some more.


Ingredients
Card size - 8.5 in x 5.5 in
Cardstock - Recollections white 65lb & 110lb for base, blue;
Stamps - Stampendous - Jumbo Peony; Cornish Heritage Farms - grid paper; Kitchen Sink Stamps - Whole Family;
Ink - Gina K Designs - black onyx; Memento - pear tart, bamboo leaves, bahama blue, danube blue, rose bud;
Color - Prismacolor pencils

Friday, February 7, 2014

Crafting with Lindsay the Frugalcrafter - Daffodils watercolor

Yet another great video tutorial from Lindsay! And I'm doing these in no particular order. Just as a tutorial or technique peaks my imagination. Here is a link to Lindsay's tutorial.

Anyway here is my 1st attempt at these daffodils.


I learnt how to draw a daffodil.  WooHoo!  Also that I wanted to clean up my drawn lines more before applying watercolor pencil. Also that it takes deft skill to make that background look effortless. Still I'm happy with my first attempt and I think I might try again with my inktense.


Ingredients

Size - 5.5 in x 8.5 in
Cardstock - Canson watercolor paper 100lb
Color - Derwent watercolor pencils

So it is later and I tried it with the Inktense and cleaning up my sketch... getting there.  Night time lighting not helping.


Sunday, February 2, 2014

Sew it's your birthday!

This is part of trying to use what I have and so I made this for my cousin who has started sewing in the last year when her grandmother gave her a sewing box and some material.   Now I don't know about you, but when I think Tim Holtz I don't think bright, white, and cheery. Don't get me wrong. I love all the vintage, bygone era, distressed look of Tim Holtz and his fans. It just wasn't going to work for a sassy preteen with a love of zebra print and purple. So on went my thinking cap and this is what I created with what I had.


I cut 1/2 inch strips of paper and adhered them to thin cardstock, making certain to tape in the middle to keep from gumming up my sewing machine. I did this for a large 11 1/2 x 8 1/2 sheet of cardstock which I cut into two panels and then sewed the panels. I did both in case I had an issue with one.

I stamped the "happy birthday" sentiment on cardstock and hoped to machine stitch it as well. Haha! That was a hot mess... so I pierced the sentiment and hand stitched it. 


The dressform was stamped with Versamark and embossed with a metallic purple embossing powder.  As for the envelope I made it to match but the paper cracked so I used other stamps in the set and made faux washi tape for the edges of the envelope and a tab to hold the flap down with some printer paper.

Ingredients
Card size - 8.5 in x 5.5 in
Cardstock - The Paper Studio: classic collection, cardstock; Recollections 65lb and 110lb;
Stamps - Tim Holtz- Seamless Experience; Stampendous - Happy Messages;
Ink - Versamark; GKD Color Companion - white;
Accessories - Zing! Purple metallic embossing powder; Sewing Machine; Thread and needle; Dimensional tape; WRMK envelope punch board.

Friday, January 31, 2014

Crafting with Lindsay the Frugalcrafter - Bird of Paradise

I get so inspired by Lindsay the Frugalcrafter that I'm planning on crafting to her videos to practice my owns skills.  So this may be a series if everything goes as planned. I watched the video first and then I played it again pausing as necessary as I am much much much slower at drawing than she is. In all, this probably took me around an hour and 15 minutes.

Lindsay's post and video. I changed things up by using black Recollections cardstock and Prismacolor Pastels. Also my pastel is 8.5 inches by 5.5 inches as I wanted the option of making it a card front.


I'm pleased with the result but obviously need more practice.  I may even try it again with my Prismacolor pencils as I don't have Artstix.

Thursday, January 30, 2014

Christmas Roundup - the disasters...

So part of the reason I started this blog is to share my crafting journey and every journey has those memorable incidents that makes the rest of the journey look like smooth sailing... thus, we come to the Christmas disasters.

All year I collected our soup tins that had a pop top lid carefully opening them with my special can opener and cleaning them and saving them to make santa tins to fill. As Christmas approached I filled them with a bag containing of chocolate nuggets, kisses and those soft peppermints you only seem to see at Christmas.  Then I glued them with E6000. Now I did this in a well ventilated area and was sure this was going to be the cutest novelty gift ever for our friends' kids.


So of course I test them on my kids first. They open them and the strong glue smell is inside the can. Oh no! Then the youngest eats some chocolate and complains it tastes funny.  I had a bit and immediately realized that the glue smell had permeated the chocolate.  Thank goodness I hadn't distributed them further than my own kids. I threw them away. My husband pit.them in the recycling bin. I didn't care as I was devastated and greatful at the same time.

My other disaster this Christmas were my Santa/Grinch (or elf) ornaments. I had a brain blip and painted the black of the belts with acrylic paint which dried flat and scraped off as I was doing the buckles. I thought I could touch them up but um let's just leave it at that didn't work either. So they are on a shelf to see if I can salvage them.  At least I didn't wax the insides...I've read that fails after a year...why wait a year when it can be in real time! LOL


Wednesday, January 29, 2014

A hint of vintage birthday

So if you follow my blog you know I start the year with quite a few birthdays and events.  Doesn't everyone? And every year I lose my mojo in January. ..it's a plot I tell ya! So this year I decided to not stress so much if this was the most perfext unique card for my BIL and just create.


I pulled loads of stamp sets and decided to use a Tim Holtz set that hadn't seen ink... I love the look of Tim Holtz inspired work but it is that little bit beyond my realm of logical comfort. I over analyze.  An internal dialogue of "oh my that is beautiful" versus "why?" "This doesn't really fit in your decorating scheme", "Would you want to dust it? " etc...


Hopefully I came up with a happy medium.  Is there such a thing as CAS (clean & simple) Tim Holtz?

BTW I am so excited over the card base I used. I know talking card bases isn't sexy but this card stock is a great weight and a great price especially with a coupon!

Ingredients
Card size - 8.5 in x 5.5 in
Cardstock - Recollections 110 lb white; kraft
Stamps - Stampers Anonymous Tim Holtz The Journey; Kitchen Sink Stamps: Whole Family;
Ink - Gina K Design black; Memento gray flannel, love letter, espresso truffle;
Accessories - Spellbinders gears; clockworks embossing folder

Tuesday, January 28, 2014

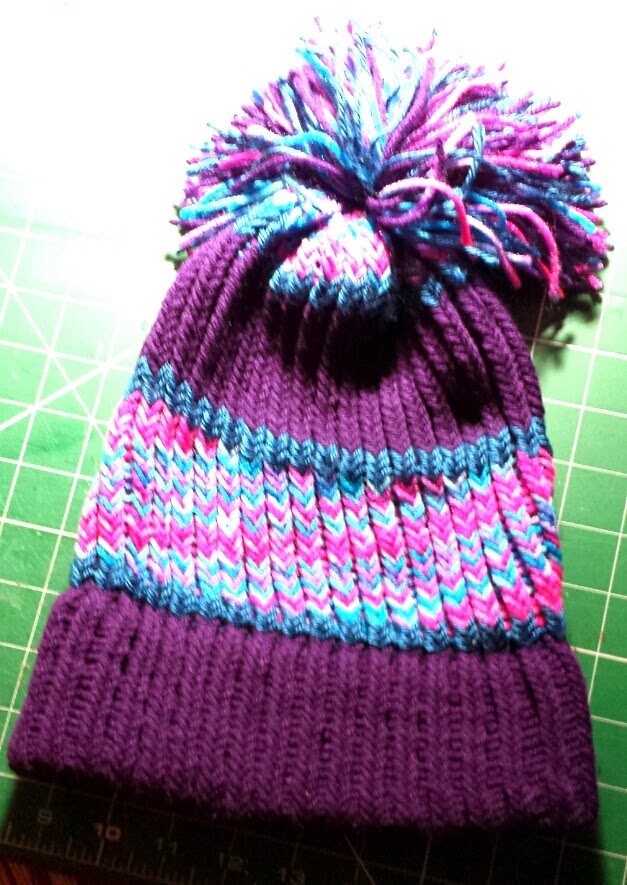
Christmas Roundup - knitted hats and scarfs

So thanks to the frugalcrafter Lindsay I discovered the joys of knitting and loom knitting.  That's a general link to her blog. I was ill with one of those coughs that keep you up all night so I put my earbuds in and watched and listened to Lindsay. She was my Lemonade when I was handed lemons.


These are all loom hats and a 6ft scarf.  I have since completed a blue, yellow and white hat and scarf and a red and white scarf.


Also I' ve made 2 ruffle scarfs for my MIL which I forgot to photograph.


The red and white hat needs to be reworked on a smaller loom...but that's the learning curve!


Here is the direct link to the knitting tutorial.  I can't stress enough how helpful I found it. I have been trying to learn to knit for years... now on to crochet!