Tuesday, October 27, 2009

Bugging a Tomboy birthday!

I think this has to be my favorite card I have made recently.
There were several things I wanted to accomplish when I made this card. I wanted the image to be of a not so girlie girl and for you to get the impression that although there is a bow in her hair and a flower in her pocket that the bow is there because her mother put it in and she is far too engrossed in tomboyish pursuits and discovery to worry about it.

Secondly I wanted to use a quirky color combo that was actually inspired by some early Halloween cards that I had seen (take that hot pink and make it purple and I think you will see what I'm talking about).


I chose my colors of cardstock first before I started to color my image, so that my color choices would compliment the image. After I colored in the little girl in Copics I decided that my glass jar would look a bit green around the edges I had already decided the bugs would have a glow about them when I colored her face in so I just went for the yellow glow. Of course because the girl isn't too girly the bugs and flower had to be sparkly so they got clear Sakura stardust on them and then what you really can't see in the pictures is that the glass jar was cover in glossy accents.

The patch on her knee reminded me of my heart Nestabilities and I looked at them and decided I wanted the sentiment to be subtle so I embossed the heart with my cuttlebug folder before cutting it. You can just see in the main photo how the ribbon goes through the heart and I debated ages about adding the brad and finally decided to do it. What do you think?

For the inside of the card I decided to use the negative of the scalloped heart as a mask to pounce the inside with color and stamp the sentiment over.

Ingredients
Card size - 5.5in x 8.5in
Cardstock - Neenah, DCWV, Michaels
Stamps - High Hopes, Kitchen Sink Stamps
Ink - Palette noir, Memento Rose bud, Memento Tangelo
Copics - E00, E02, E93, G000, 05, Y00, YR00, YR02,YR04, YR07, V15, V17, RV02, RV04, E33, E35, E37, C1, C3, C5, C7, B000, B00.
Accessories - grosgrain ribbon, brad, Nestabilities, Cuttlebug embossing folder, cropadile, Sakura stardust clear.

Monday, October 26, 2009

Stephen King's Christine for your birthday? Are you scared yet?

The recipient of this card (the Dear hubs) opened it and looked at me and somberly said, "What have I done to you?" I looked at him rather blankly and said "What you don't like the card?" He replied "You've given me Christine! What are you telling me?" and gave me a big wink... I burst out laughing. All day I kept being ribbed about giving the gift that keeps on giving like Christine did in the Stephen King movie/book.

Honestly I just liked how the color combo went together but if it keeps him worried then that isn't a bad thing. Right? LOL!

I particularly tried to pay attention to shading and how the sky would be clearer behind the windshield but there would still be a tint of color.

Ingredients
Card Size - 8.5in x 5.5 in
Card - Neenah, DCWV, Bazzill
Stamps - Clear Dollar Stamps - Cruisin Classic
Ink - Memento Tuxedo Black
Color - Copics 0, C1, C3, C5, C7, R32, R35, R37, Y00, Y06, Y08, B000, B00, B02
Accessories - grosgrain ribbon.


Friday, October 23, 2009

Masculine mechanic mania (birthday didn't sound right!)

I just had to do this card quick and to the point - I wonder if it "qualifies" as CAS (clean and simple) - I guess it might only be a OLW (one layer wonder)
This card is pretty straight forward. I stamped my Clear Dollar Heavy Metal stamp in Memento London Fog for the background. I then played. I put the nuts on the card, then the wrench, then the screws and then worked out that I could put the Happy Birthday sentiment with three screwdrivers across. As I wanted the Happy Birthday to pop I opted for Lady Bug Red and then stamp more screws across the top.
With the little peek toward the inside you can see that I stamped the screws and screwdrivers in London Fog again on the bottom of the inside of the card.
I guess its obvious this card was for the special mechanic in my life, however, I think it can easily be given to a mechanical hobbyest too.
Ingredients
Card size - 5.5in x 8.5 in
Cardstock - Georgia Pacific
Stamps - Clear Dollar Stamps - Heavy Metal, Screwdriver and Screws, Wrench and Bolt.
Ink - London Fog, Memento Tuxedo black, Lady Bug

Thursday, October 22, 2009

I've got the Moo-sic in me! What Party a Animal.

I love this cow stamp from High Hopes! It's downright moo-ving, and makes me feel so moo-sical! It is absolutely udder-ly fun! The punny thing is that this card started with the candles!

For some reason I had Sixteen Candles in my head for my niece's 16th Birthday - well I think we can all agree I put a few more than sixteen on here but the stamp just made such fun and unique background paper.

I also used the cake from the same Stampendous set so our cow would have a purpose other than to party her life away!

My cow likes to party all the time, party all the time, party all the time...oh dear went a bit 80's retro there for a moment! However I made certain she was ready to impress, her cake candles have stickles and her hoofs are polished (glossy accents) and what silly card worth its milk doesn't use googly eyes when the opportunity presents itself?!?!?!

I cut out our party cow and cake and then had to think... what would pop with the colors I had already selected. I decided that pink and green color combo doesn't get the love it once did (and having a massive mound of green cardstock staring at me as well probably didn't hurt).

Now to decide on the layout... well I never said my process was straight forward. I had already decided to have a more upright card by the placement of the candles, thought they might look a bit odd on their sides LOL. So I trimmed up my artwork GASP! HORROR!! to make it fit the front of my card and started mounting everything... now the guilt trip over the little slip of tenderly stamps and colored background - my aha moment was to mount it and use it to decorate the inside of the card which you can just see with the photo.

Hope you like it! and thanks for all the support.

INGREDIENTS
Card size - 8.5 x 5.5 inches
Cardstock - The Paper Source, Neenah, Georgia Pacific

Stamps - High Hopes Party Cow; Stampendous Fifteen Candles;
Ink - Palette Noir
Copics -
Cow - 0, W3, W5, W7, C5, C7, E50, E51, R00, R20
Cake - 0, RV000, RV02, RV04, RV06, R00, Y02, Y06, Y08, C3
Background - RV02, RV04, Y02
Accessories - Stickles, Glossy Accents, googly eyes

Tuesday, October 20, 2009

It's all about Zoe! and learning how to alter the collection I have amassed!

This is a whole gift set that I made to send to my neice for her 16th Birthday. I thought it turned out pretty cute. I got this We R Memorykeepers paper pack with purchase at Archivers and thought it was quite funky and youthful (which probably means it isn't - LOL). I know there is nothing "new" here to rock the blogging world but just a bit of sharing. I went to cover the letters and they are taller than my 6x6 paper so I thought I would embellish with ribbon at each end and in the middle of the "o". The ribbon "blossom" I have seen everywhere but didn't bother reading any instructions I just threaded ribbon folded on an angle on thread and tied it off and that is what I got. I went through my brad stash and liked how the brad echo'ed the dots in the paper and added a bit more whimsy. Then added some clear Michaels "dew drops" for a little bit of bling and edged each letter with white grosgrain ribbon to finish the edges, which was probably the most difficult part.

On to the next part of the gift - notecards! I liked mixing it up with the paper selection and the DCWV cards I had picked up in one of the Michael's sales ages ago. With my Nestabilies, my Palette ink pad and my JustRite Stampers I think they came out pretty cute. So just bear with my proud mamma moment...
And then there is this one! I think I frugally love it the best because I just used the ends that I cut off from all of the cards above to make it!

Then I was stumped! Yikes - I need to package these. How about a cute ribbon. No. That didn't work. It looked sloppy and it might come undone on its trans-Atlantic journey. What can I do? I will have to make a box of some sort. So I got out my Scor-pal and played.


oh wait!
There is something more!

I can't fool you - you saw them above didn't you?

I had to throw in some beaded pens. This time I put the patterned paper inside the pens and covered the pens with microbeads and then sealed them with Glossy Accents. I forgot to tell her the pens are refillable so I will have to let her know and that she can put other patterned paper in them because of how I did them.
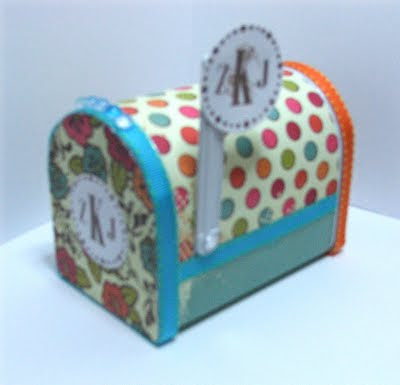
Then I just had to have a go at a mini mailbox - perfect to send a few post-it notes

I would have loved to put some stamps in the mail box but she is overseas so that wouldn't really work. I also added loads of fun school supplies. She is planning on training to be a Nursery school/Pre-school teacher so I hope all the little fun supplies will come in handy with her school work or just be whimsical play for her.

I think these are the first set of alterables I have done so I'm pretty pleased with them - hope you like.

And thanks for the previous comments - I do my blog to keep my friends (past, present and future) up to date with my hobby, but its always nice when someone likes something and tells me! I really need to make more effort to leave some blog love!

Hopefully the ingredient list for this is pretty straightforward so I won't bother with this post.

Wednesday, October 14, 2009

Coo-ey! Its me and I have ...

cards to share.

Wow! I can't believe it has been so long since I have posted I have loads (well for me) to share so hopefully I will get the rest of up soon!


This card went to a special friend in England. She is very no-nonsense and truthfully she is a perfectionist and loves everyone's work but her own which is fabulous. I keep missing chatting to her at the moment but hopefully will get that sorted out soon. I think she qualifies as my first cyber friend. She helped me through loads in the cyber world even when I was kicking and screaming and losing my connection down the M40! LOL

Sorry about the pictures - I know they're not great but its the best I could do with the conditions... Honestly I took a whole load of pictures one day and editted them and binned the lot so these are take two so be kind.

I have to admit that I waited ages for these High Hopes stamps but I do love their images. They have recently gone to wholesale only so its probably best to order from your favorite vendor on their list.

I wanted to keep the card simple in style so I grided the background rather than using patterned paper.

The big decision on this card was sticking with the black card base... I wanted that inside surprise image to pop through visually.

Ingredients:
Card Size - 8.5 in x 5.5 in
Cardstock - The Paper Company, Bazzill, Neenah Solar White
Ink - Palette noir
Copics - 0; skin E00, E02, E11; jeans B93, B95, B97; shirt B00, B23, B24, B29; hair Y11, Y21, Y28, E33, E47; tire/tyre W1, W3, W5, W7; branch E43, E47; leaves G00, G02, G05; sky B000, B00; rope E31, E35, E37.
Accessories - ribbon from Michaels, Scor-pal